Geo Master est sur Greenlight !

,

Je vous présente mon dernier jeu nommé « Geo Master », jeu de géographie en 3D. Ce jeu offre plusieurs modes d’apprentissage ludiques. Vous avez la possibilité d’explorer le globe, de tester vos connaissances sans challenge puis de vous confronter au monde entier dans des parties chronométrées sur la planète entière ou sur le continent de votre choix !

Le mode UNESCO vous offre également la possibilité de découvrir les monuments et lieux classés au patrimoine mondial.

Le mode « Faits incroyables » vous donne des détails amusants et surprenants sur la planète Terre.
Enfin, un mode multijoueur vous permet d’affronter d’autres joueurs en ligne ou en local en temps réel !

Geo Master vient d’être publié sur les plateformes mobiles, et j’ai besoin de votre aide pour être publié par Steam ! Si vous avez un compte Steam je compte sur vous pour voter ! 🙂

greenlight_vote


[TUTORIAL] Unity3D – Signing and Packaging your game for the Mac AppStore and Outside !

, ,

I spent some times to understand the way to sign and package an .app generated from Unity3D for the Mac AppStore or for outside of it. The workflow is quite the same, you will need to type a few lines of code in order to generate the proper files.

The few differences are that you don’t need the « entitlements »  file and the certifactes are different.

If you want to publish your game outside the store, from the Apple Member Center, you will need to generate the « DEVELOPER ID » application and installer certificates. Then install them by drag and dropping them into you keychain access.

For the Mac AppStore, you have to generate the « MAC APP STORE » production application and installer certifcates.

I made a script in order to automate the signing and packaging process. Here it is on GitHub :

:: GitHub File ::
#!/usr/bin/perl use File::Copy; use File::Find; use File::Path; use Cwd; # Exoa SignAndPackage script v1.3 # Author : Anthony Kozak :: exoa.fr # Place this script in the same folder as the generated .app file from Unity # YOU WOULD NEED IN THIS DIRECTOY: # - a filled Info.plist file # - a PlayerIcon.icns file # - a filled entitlements.entitlements file # - a UnityPlayerIcon.png file # YOU CAN CHECK YOUR INSTALLED CERTIFICATES NAMES USING # security find-identity -p codesigning logit("Hello !"); my $app_found = found_app_indir(); my $appName = ask("What's the .app name in this directory ?", $app_found); my $appPath = getcwd . "/".$appName.".app"; my $appType = ask("Is this app for the MacAppStore or External ?","MacAppStore"); my $appPathSigned = getcwd . "/".$appType."/".$appName.".app"; my $packagePath = getcwd . "/".$appType."/".$appName.".pkg"; #my $profile = ask("What's the provision profile name to use in this directory ?","profile.provisionprofile"); my $doCodeSigning = ask("Sign the app ?", "true"); my $doCreatePackage = ask("Generate package ?","true"); my $copyInfopList = ask("Copy Info.plist from this directory inside the .app ?","true"); my $copyIcons = ask("Copy PlayerIcon.icns from this directory inside the .app ?","false"); my $copyIcon = ask("Copy UnityPlayerIcon.png from this directory inside the .app ?","true"); my $srcAssetPath = "/"; my $certificateApplication = ask("What's the application certificate name ?", $appType eq "MacAppStore" ? "3rd Party Mac Developer Application:" : "Developer ID Application:"); my $certificateInstaller = ""; if($doCreatePackage eq "true") { $certificateInstaller = ask("What's the installer certificate name ?", $appType eq "MacAppStore" ? "3rd Party Mac Developer Installer:" : "Developer ID Installer:"); } my $entitlementsFileName = ""; if($appType eq "MacAppStore") { $entitlementsFileName = ask("What's the .entitlements file name in this directory ?", "entitlements.entitlements"); $entitlementsFileName = "--entitlements \"".$entitlementsFileName."\""; } logit("*** Starting Process - Building at '$appPath' ***"); # src and dest are temp variables. Just ignore them... 🙂 my $src = ""; my $dest = ""; # Removing previous dir rmtree $appType; # Creating target dir mkdir $appType, 0755; # this copies your own /Info.plist to the generated game if($copyInfopList eq "true") { $plist = getcwd . $srcAssetPath . "Info.plist"; $dest = $appPath . "/Contents/Info.plist"; print ("\n*** Copying " . getShort($plist). " to " . getShort($dest)); copy($plist, $dest) or die "File can not be copied: " . $plist; } # this copies PlayerIcon.icns to your generated game replacing the original app icon by your own if($copyIcons eq "true") { $icons = getcwd . $srcAssetPath . "PlayerIcon.icns"; $dest = $appPath . "/Contents/Resources/PlayerIcon.icns"; print ("\n*** Copying " . $icons . " to " . $dest); copy($icons, $dest) or die "File can not be copied: " . $icons; } # this copies /UnityPlayerIcon.png to your generated game replacing the original Unity Player Icon by your own if($copyIcon eq "true") { $playericon = getcwd . $srcAssetPath . "UnityPlayerIcon.png"; $dest = $appPath . "/Contents/Resources/UnityPlayerIcon.png"; print ("\n*** Copying " . getShort($playericon) . " to " . getShort($dest)); copy($playericon, $dest) or die "File can not be copied: " . $playericon; } # this copies $profile to your generated game #$src = getcwd . $srcAssetPath . $profile; #$dest = $appPath . "/Contents/embedded.provisionprofile"; #print ("\n*** Copying " . getShort($src) . " to " . getShort($dest)); #copy($src, $dest) or die "File can not be copied: " . $src; # this copies appPath to appPathSigned and use it print ("\n*** Copying " . getShort($appPath) . " to " . getShort($appPathSigned)); system("cp -r \"".$appPath."\" \"".$appPathSigned."\""); ## Chmod and remove unecessary files system("/bin/chmod -R a+rwx \"$appPathSigned\""); system("find \"$appPathSigned\" -name \*.meta -exec rm -r \"{}\" \\;"); system("/usr/sbin/chown -RH \"cestdesbullshit1:staff\" \"$appPathSigned\""); system("/bin/chmod -RH u+w,go-w,a+rX \"$appPathSigned\""); my $CodesignEnvironment = $ENV{'CODESIGN_ALLOCATE'}; $ENV{'CODESIGN_ALLOCATE'}="/Applications/Xcode.app/Contents/Developer/Toolchains/XcodeDefault.xctoolchain/usr/bin/codesign_allocate"; # Auto code signing if ($doCodeSigning eq "true") { recursiveCodesign("$appPathSigned/Contents/Frameworks"); recursiveCodesign("$appPathSigned/Contents/Plugins"); recursiveCodesign("$appPathSigned/Contents/MacOS"); logit ("*** Start signing"); system("/usr/bin/codesign --force --timestamp=none --sign \"" . $certificateApplication . "\" ".$entitlementsFileName." \"" . $appPathSigned . "\""); logit ("*** Verify signing"); system("codesign --verify --verbose \"" . $appPathSigned . "\""); } # Auto creating a package file? if ($doCreatePackage eq "true") { logit("*** Start packaging"); system("productbuild --component \"" . $appPathSigned . "\" /Applications --sign \"". $certificateInstaller . "\" --product \"$appPathSigned/Contents/Info.plist\" \"" . $packagePath . "\""); } $ENV{'CODESIGN_ALLOCATE'}=$CodesignEnvironment; logit("*** ALL DONE ! ***"); sub ask{ my $text = shift; my $default = shift; logit($text . " [default: ".$default."]"); my $answer = <STDIN>; chomp $answer; return ($answer eq "") ? $default : $answer; } sub logit{ my $text = shift; print("\n".$text."\n"); } sub recursiveCodesign { my $dirName = shift; print("\n*** Recursive Codesigning ".getShort($dirName)."\n"); opendir my($dh), $dirName or return; my @files = readdir($dh); closedir $dh; foreach my $currentFile (@files) { next if $currentFile =~ /^\.{1,2}$/; if ( lc($currentFile) =~ /.bundle$/ or lc($currentFile) =~ /.dylib$/ or lc($currentFile) =~ /.a$/ or lc($currentFile) =~ /.so$/ or lc($currentFile) =~ /.lib$/ or (-f "$dirName/$currentFile" && $currentFile =~ /^[^.]*$/ && `file "$dirName/$currentFile"` =~ /Mach-O/) ) { print("\tCodesigning ".getShort($currentFile)."\n"); system("/usr/bin/codesign --force --timestamp=none --sign \"".$certificateApplication."\" \"$dirName/$currentFile\""); } if (-d "$dirName/$currentFile") { recursiveCodesign("$dirName/$currentFile"); } } } sub found_app_indir() { opendir(my $dh, '.') || die "cant open dir"; my @list_found = grep { /.app$/ } readdir($dh); my $app_found = @list_found[0]; chop($app_found); chop($app_found);chop($app_found); chop($app_found); return $app_found; } sub getShort() { my $subject = shift; my $search = getcwd . "/"; my $replace = ""; my $pos = index($subject, $search); while($pos > -1) { substr($subject, $pos, length($search), $replace); $pos = index($subject, $search, $pos + length($replace)); } return $subject; }

1) After installing your certifcates, place this script in the same directory as your .app generated by Unity3D

2) Add the optional files in the same directory such as  Info.plist, PlayerIcon.icns,  entitlements.entitlements,  UnityPlayerIcon.png. They will be overridden inside the .app

3) Open a terminal and launch the script ./SignAndPackage.pl

4) Answer the configuration questions and let the script do the job !


Note : You can check that your certificates are installed using this command line :

security find-identity -p codesigning

You don’t need to fill the full name of the certifcates when requested. The default values can be good enough. For example if your certificate is called « 3rd Party Mac Developer Installer: MY DEVELOPER NAME (68684684) », you can just enter « 3rd Party Mac Developer Installer ».

 Edit: Version 1.1 now available

Edit: Version 1.3 removed the embedded profile that was crashing the Application Loader

Unity3D – Tips when building your game with an Editor script

, ,

Here are some basic tricks when you need to build your game by code.

First you can launch a build process with a single line of code, for example :

[MenuItem("Exoa/Build/Android")]
public static void PerformBuildAndroid()
{
	string fullPath = Application.dataPath.Replace("/Assets", "/") + "_BUILDS/android/build.apk";
	// Build Game
	BuildPipeline.BuildPlayer(allScenes, fullPath, BuildTarget.StandaloneWindows, BuildOptions.None);
}

For Android

Then you can install your game on the connected Android device like this :

[MenuItem("Exoa/Build/Install build on Android")]
public static void InstallAndroid()
{
	// Run the game (Process class from System.Diagnostics).
	string fullPath = Application.dataPath.Replace("/Assets", "/") + "_BUILDS/android/build.apk"; 
	proc = new System.Diagnostics.Process();
	proc.StartInfo.FileName = "D:/SDK/android/sdk/platform-tools/adb.exe"; // replace with your adb exe path
	proc.StartInfo.Arguments = "-d install -r " + fullPath;
	proc.Start();
}

Then you can launch the application on the android device like this :

[MenuItem("Exoa/Build/Launch on Android")]
public static void LaunchAndroid()
{
	// Run the game (Process class from System.Diagnostics).
	string fullPath = Application.dataPath.Replace("/Assets", "/") + "_BUILDS/android/build.apk";
	string appid = PlayerSettings.bundleIdentifier;
	proc = new System.Diagnostics.Process();
	proc.StartInfo.FileName = "D:/SDK/android/sdk/platform-tools/adb.exe"; // replace with your adb exe path
	proc.StartInfo.Arguments = "shell am start -n " + appid + "/com.unity3d.player.UnityPlayerNativeActivity"; 
	proc.Start();
}

For Desktop

For desktop releases, you can automatically launch the build with the Process() class :

[MenuItem("Exoa/Build/Run Exe %&r")]
public static void RunGame()
{
	string fullPath = Application.dataPath.Replace("/Assets", "/") + "_BUILDS/win/build.exe";

	// Run the game (Process class from System.Diagnostics).
	Process proc = new Process();
	proc.StartInfo.FileName = fullPath;
	proc.Start();
}

Opening build folder

You can finally automatically open the build folder like Unity do :

[MenuItem("Exoa/Build/Open Build Folder")]
public static void OpenBuildFolder()
{
	string fullPath = Application.dataPath.Replace("/Assets", "/") + "_BUILDS/";
	fullPath = fullPath.Replace("/","\\");
	Debug.Log(fullPath);
	proc = new System.Diagnostics.Process();
	proc.StartInfo.FileName = "explorer.exe";
	proc.StartInfo.Arguments = fullPath;
	proc.Start();
}

NSAppTransportSecurity fix for Unity3D and iOS 9

,

If you upgraded to iOS 9, you probably noticed that the HTTP requests inside Unity were returning an error about domain permissions.

If you can’t upgrade to the latest Unity 5 patch adding NSAppTransportSecurity features. You will need to add a few lines of code inside the info.plist file after each build.


You will shortly find the need to add it automatically after each build, so I published a short trick for that on GitHub :


:: GitHub File ::
/** @author : Anthony KOZAK :: exoa.fr @description : Add your domain to the NSAppTransportSecurity for ios 9 in Unity Add it automatically or manually from a custom editor menu. **/ using System; using UnityEditor; using UnityEngine; using System.Collections.Generic; using System.IO; public class NSAppTransportSecurity { [MenuItem("Exoa/Build/Add NSAppTransportSecurity")] private static void AddNSAppTransportSecurity() { string domain = "yourdomain.com"; string filepath = Application.dataPath.Replace("/Assets", "/") + "_BUILDS/ios/build/Info.plist"; if (File.Exists(filepath)) { StreamReader streamReader = new StreamReader(filepath); string text = streamReader.ReadToEnd(); streamReader.Close(); if (text.IndexOf("NSAppTransportSecurity") < 1) { text = text.Replace("<key>CFBundleDevelopmentRegion</key>", "<key>NSAppTransportSecurity</key>\n<dict>\n<key>NSExceptionDomains</key>\n<dict>\n<key>" + domain + "</key>\n<dict>\n<key>NSIncludesSubdomains</key>\n<true/>\n<key>NSExceptionAllowsInsecureHTTPLoads</key>\n<true/>\n<key>NSExceptionRequiresForwardSecrecy</key>\n<true/>\n<key>NSExceptionMinimumTLSVersion</key>\n<string>TLSv1.2</string>\n<key>NSThirdPartyExceptionAllowsInsecureHTTPLoads</key>\n<true/>\n<key>NSThirdPartyExceptionRequiresForwardSecrecy</key>\n<true/>\n<key>NSThirdPartyExceptionMinimumTLSVersion</key>\n<string>TLSv1.2</string>\n<key>NSRequiresCertificateTransparency</key>\n<false/>\n</dict>\n</dict>\n</dict>\n<key>CFBundleDevelopmentRegion</key>"); File.WriteAllText(filepath, text); Debug.Log("NSAppTransportSecurity Added for domain " + domain); } } } [PostProcessBuild(1080)] public static void OnPostProcessBuild(BuildTarget target, string path) { print("OnPostProcessBuild " + target + " " + path); AddNSAppTransportSecurity(); } }


Unity3D – incrementing build version number automatically

Here is how I upgrade my build version number automatically before each build :

:: GitHub File ::
/** @author : Anthony KOZAK :: exoa.fr @description : Increment your game version number in Unity Launched automatically at each build process or manually from a custom editor menu. **/ using System; using UnityEditor; using UnityEngine; using System.Collections.Generic; using System.IO; public class IncrementVersionNumber { [MenuItem("Exoa/Build/Increment version")] public static void IncrementVersion() { string version = PlayerSettings.bundleVersion; string[] parts = version.Split('.'); int lastNum = int.Parse(parts[parts.Length - 1]); lastNum++; string newVersion = ""; for (int i = 0; i < parts.Length - 1; i++) newVersion += parts[i] + "."; newVersion += lastNum; int newVersionCode = int.Parse(newVersion.Replace(".", "")); Debug.Log("IncrementVersion " + version + " " + newVersion + " " + newVersionCode); PlayerSettings.bundleVersion = newVersion; PlayerSettings.Android.bundleVersionCode = newVersionCode; } [PostProcessBuild(1080)] public static void OnPostProcessBuild(BuildTarget target, string path) { print("OnPostProcessBuild " + target + " " + path); IncrementVersion(); } }

IndieTrainers – Nouveau centre de formation Unity3D !

,

IndieTrainers est un nouvel organisme de formation spécialisé dans la conception de jeux vidéo. Leur formule originale consiste en une série de formations courtes, ultra spécifiques pour répondre aux besoins des professionnels ainsi que des stages d’initiation pour débutants.

Quatre catégories sont proposées : Développement, Game Design, Level Design et Sound Design, avec pour chacune plusieurs stages bien ciblés ( exemples : 2D, Mobile, Programmation de Shaders, Jeu en réseau, Wwise etc ).

Les formations ont lieu principalement à Lille et Paris mais des solutions à la carte sont également proposées partout en France.

Le lancement aura lieu pour la rentrée scolaire. Les premières sessions débuteront à partir de Novembre prochain et seront ensuite programmées mensuellement.

Site Internet : http://www.indietrainers.com

AssetStore « Layered Scene Screenshot »

,

Premier script publié dans l’Asset Store d’Unity3D, cet utilitaire vous permet de prendre des screenshots de votre jeu au runtime, découpés en calques et exportés en png transparents.

Il vous permet par exemple de placer vos enemis sur un calque, votre héro sur un autre et votre décor sur un troisième. Lors de l’appui sur une touche définie, trois images PNG avec alpha seront créées de la même dimension contenant vos objets découpés.

Télécharger « Layered Scene Screenshot » sur l’Asset Store

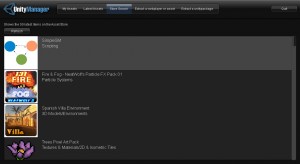
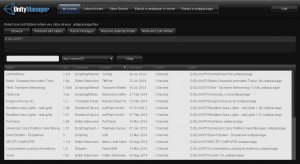
UnityManager Update

New update for the UnityManager Application.

This new version integrates the ability to unpack the webplayers (.unity3d files) and unpack their .assets files with the integration of Disunity.

Main Features :
– List all packs in folders you select
– Let you search and filter by name, author, version, category etc
– Auto Sort packages and rename them using their asset store informations
– Asset Store information Popups
– Right click shortcut menus on .unitypackage files (windows only)
– Asset Store search and latest entries
– Unpack .unitypackage files
– Unpack .unity3d and .assets files

Download Version 1.0.52
UnityManager – Windows Version
UnityManager – Mac Version

new-assets

new-packs


Formation en développement Unity3D

,

Une nouvelle formation Gaming s’achève à la Technocité  de Mons ! Les 13 élèves formés ont réalisé en deux semaines, deux prototypes de jeux vidéo 2D, après quelques semaines de formation en game-design, graphisme et développement Unity3D. Voici la présentation des deux projets :

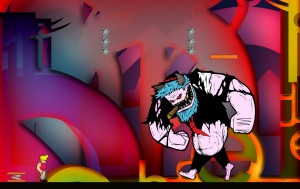
Stevie no jobs


Promo Stevie 2Tout allait bien pour Stevie, jusqu’à ce que le Prince Démon des Crises Economiques n’en décide autrement en l’expédiant au chômage manu militari.

Mais notre héros, bien décidé à ne pas se laisser faire, sait qu’il pourra acquérir la connaissance nécessaire pour vaincre le chômage en rejoignant la Technocité.


Stevie promo 3


Suivez Stevie dans sa quête épique pour le plein emploi dans « Stevie no Jobs », un jeu de plateforme dynamique et amusant.

Et vous aussi, découvrez les secrets des formations de Technocité pour faire face à la crise.


Musée du Temps

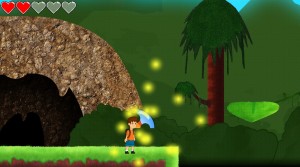
MDT_Screenshot3« Musée du temps » est un serious game à destination des enfants de l’enseignement primaire en complémentarité de l’école. Il a pour but d’apprendre les inventions à travers les époques sous la forme d’un jeu de plateforme et de collecte d’objets.


Histoire

Lors d’une visite au musée avec son école, un enfant visite une salle représentant les différentes époques de l’Histoire avec des tableaux. Il se retrouve alors plongé dans ceux-ci, accompagné d’une petite fée afin de vivre des aventures historiques ! Il lui faudra parcourir les différentes périodes afin d’explorer le temps et de retrouver les grandes inventions de l’Histoire.


MDT_Screenshot2Le jeu

Le joueur évoluera dans un monde en 2D, devant éviter les obstacles et trouver les diverses pièces de puzzles pour débloquer les inventions en explorant les différentes époques de l’Histoire. Le joueur pourra ainsi découvrir de façon ludiques les grandes inventions qui ont façonné notre histoire, et voir à quoi pouvait ressembler notre passé.


Le projet a été développé dans le cadre de la formation « Casual & Serious Gaming » à Technocité – Mons (Belgique). Des contraintes nous ont été imposées pour la réalisation de ce projet, notamment l’utilisation du moteur Unity ainsi que le public cible.


Christmas Vengeance – Unity3D mobile prototype

,

Cette semaine, nostalgique du noël passé, je décidais d’utiliser mon moteur Mecanim de Third Person Shooter pour un petit jeu mobile. Ce moteur gère tout type d’armes, du couteau au lance flamme en passant par les armes à munitions. Il gère donc également les munitions, ramassages d’armes, douilles et impactes sur les murs.

L’intérêt de ce système réside dans l’implémentation rapide sur un nouveau personnage. Toutes les animations sont retargetable grâce à Mecanim. Les pieds sont gérés par IK Foot Placement, et le tout est attaché à un système de découpe de ragdoll procédural. ainsi en partant d’un prototype de jeu de zombie, j’ai pu arriver à un Cartoon TPS en une petite semaine de temps.

Voici un aperçu du prototype :